What is this guide?
Click here for a PDF version of this guide which you can print and take to the room with you
This page is a guide on how to remove a section of the recording.
Accessing the media editor
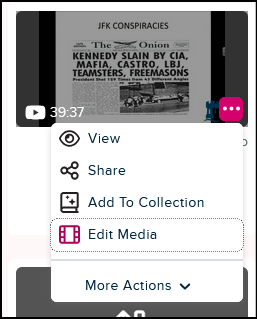
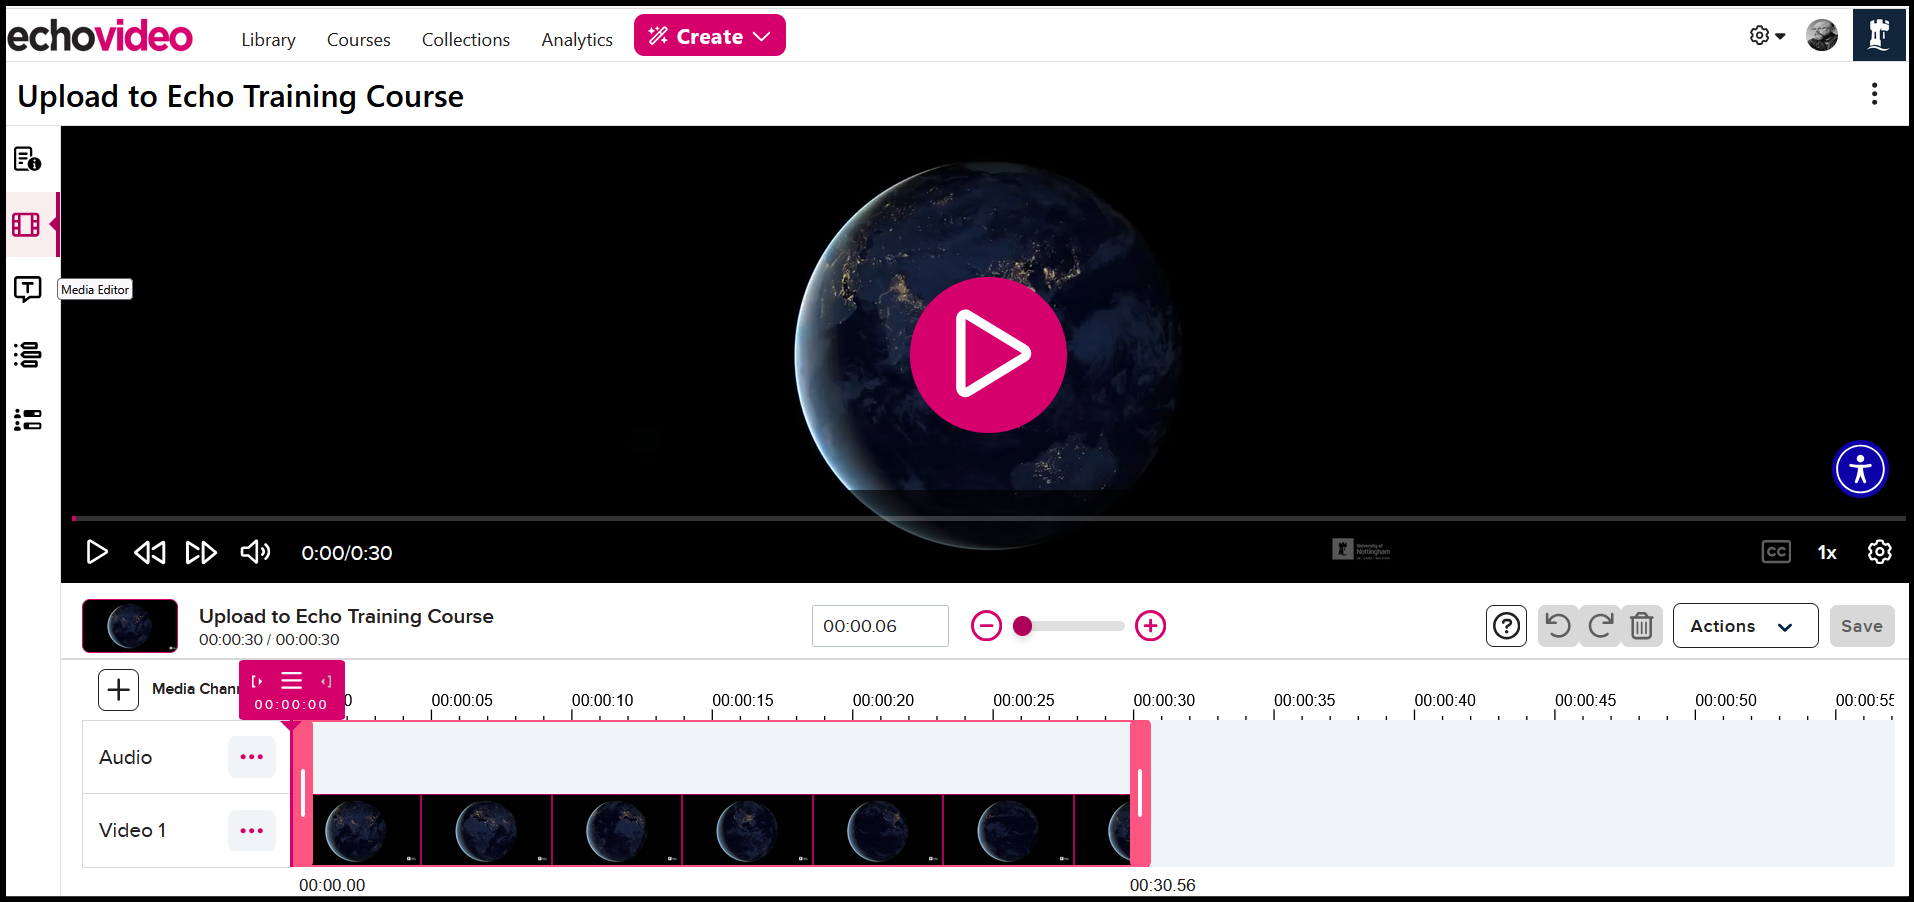
- The media editor can be accessed either from the Media tile menu in your content library or from the Media Details page.
- Edit Media is an option in the Media Tile menu as shown in the below figure.
- Edit media in the Media Details page: shown in the below figure.
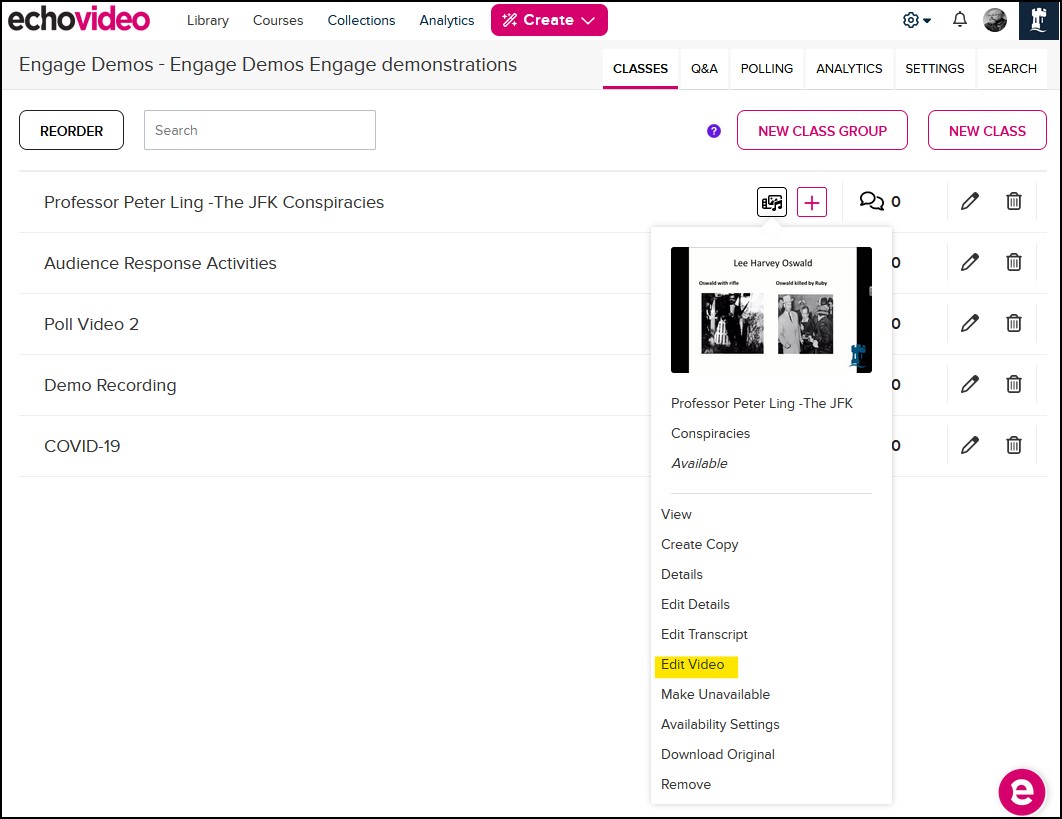
- If wish to edit one of your colleagues videos this can be done from the Class List icon menu for the video, clicking the video icon to open the menu, click edit video from the list as shown in the figure below.
Editing a recording
- If you do not wish to affect the videos that have already been published click cancel and return to your library or echo360 section and create a copy to edit How to copy a reording
Removing a section of the recording
Note: there are 3 ways to move the "play head marker"

• Play the video and pause it where you want to apply a cut
• Click and drag the play head marker in the time-line to the location where you wish the cut to be
• Hover the mouse over the time-line, then click in the time-line to the location where you wish to cut
- Place the play head marker at the start of the section you wish to remove.
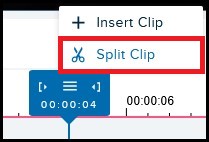
- Click the menu icon in the play head and select scissors (split clip) option the to create a cut
- Place the play head marker at the end of the section you wish to remove.
- Click the menu icon in the play head and select scissors (split clip) option the to create a cut
Note the pink bars at the start and end of the recording will move when you use the scissors, they may not be selectecting the area you have just created with your cuts, please ignore them at this stage.
- Click between the cuts you have just made to select the unwanted section. This will move the play head marker into that area, and the pink bars to the start and end of the section, this is now selected ready for deletion.
- Click "Delete"(bin) button (as shown below) to remove the selected segment from the video playback.
- Repeat these steps for each segment of the video you would like to remove.
- Again, at any time, you can zoom in/out on the timeline for a more precise view of a section of video.
- Use the Undo and Redo buttons to restore or revert changes made.
Saving the edits
- Clicking SAVE - will applies the changes you've made to this video. (and all published versions)
You will be returned to your library where the recording tile will indicate that the edits are being processed.
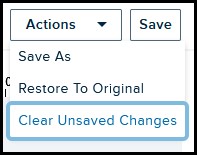
Actions
In the Actions drop-down menu you are able to perform a number of operations
-
Clicking SAVE AS - Creates a NEW VERSION of the video based on your edits. This will appear in your library (if you were not the original owner of the video, you will own this copy.
-
In the SAVE AS pop-up you also have the option to save a "course copy" which allows you to publish this new video directly to a new Echo360 course.
-
Clicking Clear Unsaved Changes - this will clear all the unsave edits you have just performed on the video.
-
The Restore to Original option will only be available on a vdeo you have previously edited and saved. cliking this button will erase all previous edits to this video. (Note if saved in this state this will affect all published version of the video be sure you wish to do this)
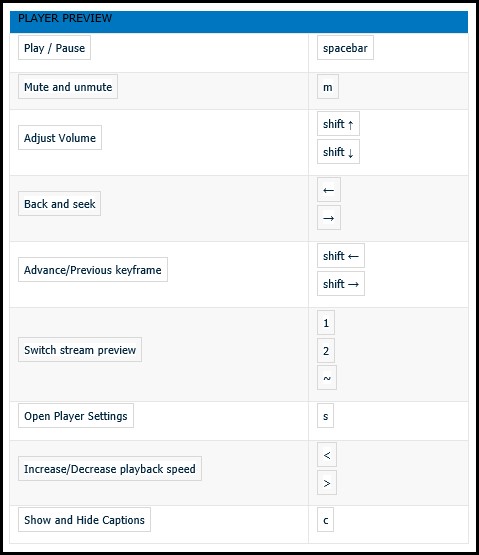
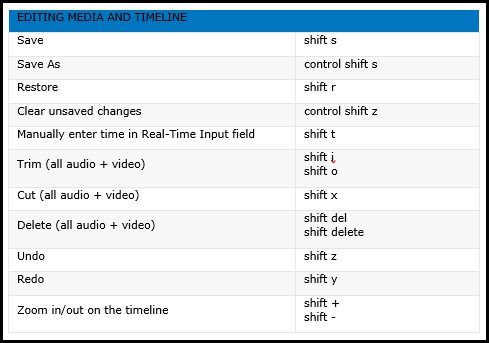
Keyboard shortcuts
Playback Shortcuts
Editing Shortcuts
Notes
Processing occurs immediately after selecting to Save, Save As, or Restore, the processing of your changes begins immediately, however processing may take some time to finish, depending on the video length and the number of edits.
This means three things:
1) Students or other users will not see the edited version until processing is complete.
2) You should not try to re-edit the video until the initial changes are processed.
3) The transcript will be re-processed to be in sync with your new edited video, therefore you will need to do two further steps. a) Check/edit the new transcript. b) Apply the new transcript to closed captions [cc] or they will display incorrectly.
Click here for a PDF version of this guide which you can print and take to the room with you

